Tuesday, August 27, 2013

How long will you garden this year?


I’ve heard more people than usual talk about putting their gardens to bed early this year. We’ve had so much that gardeners have lost tomato plants to root rot. My tomatoes aren’t producing like usual, but the garden is still producing.

Unless there’s a weather disaster, I typically harvest fruits and vegetables through October, sometimes even into early November. Here’s a tour of the garden this week with a few thoughts on the longevity of each plant.
Come to my house and plants will greet you as you walk up the steps to our kitchen door. The basil (bottom) will last until first frost. I’ll bring it indoors before first frost, or put it in the greenhouse, but it seldom does well after summer. Next are the Gerbera Daisies. They are one of my favorite flowers because of their vibrant colors. They’ll live inside during the winter and even bloom every few months if they get enough light. My goal is to keep them through the winter so I can put them out again next year. At the top you see the Angel Wing Begonia. I’ve tried to keep it inside over the winter but it gets gangly. If you have a tip for how to prevent that, let me know!

Our peaches didn’t do so well this year. The problem was a double one—too much shade from a still-growing tulip poplar tree and too much rain. We are getting a few small fruits and they won’t last more than another week or two. The tree grew from a peach pit thrown into our yard so we’re happy with anything we get from this unexpected addition to our garden.


I picked about two-thirds of our beans over the weekend. I like growing beans to dry then store over the winter. This year I grew our typical Pinto Beans along with two experiments—Pawnee Shell Beans and Hutterite Beans. I’ll give a taste report on the last two when I try them. The rest will be dry enough to pick within the month.
I don’t know how long the tomatoes will last. These San Marzanos are the happiest in the bunch right now. I do have seven plants elsewhere in the yard that came up as surprises from last year. They all still have green tomatoes and didn’t get as much rain so perhaps they’ll produce longer.

In the foreground are the nasturtiums, which have grown abundantly this year. They should last until late September or October. Behind them is the perennial Mountain Mint (with the white flowers) that I rub on my skin to repel mosquitoes. It will be okay until a hard frost.
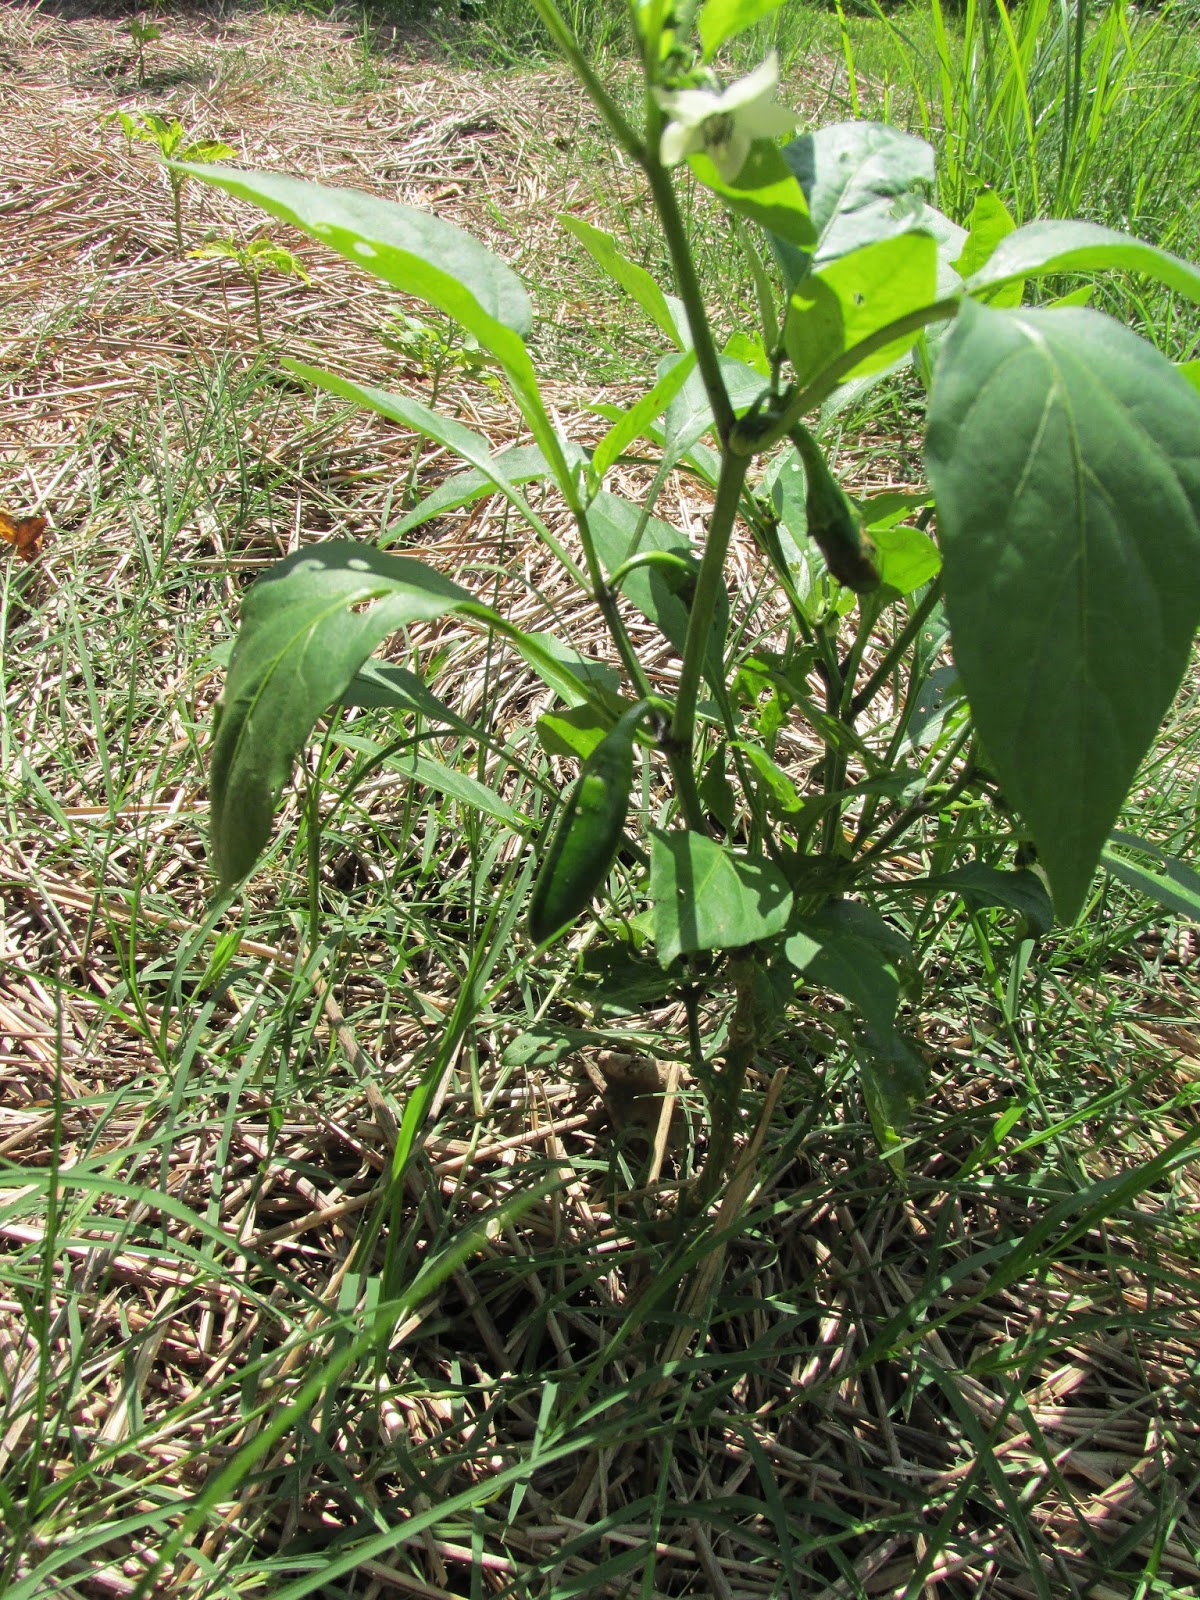
My peppers did poorly this year, another victim of shade and rain. They usually last until first frost and sometimes past then if I cover them.


The Swiss Chard has been abundant this year and will produce throughout the fall. That makes me happy because I do love chard.


The kale also continues to flourish, giving me abundant opportunities to experiment with this healthy veggie from the cruciferous family.

Yes, we have a walnut tree. Our best walnut harvest was when a local man collected our walnuts, and what fell into the neighbor’s yard, took them for processing then brought us a package of ready-to-use walnuts as payment. I hope he shows up again this year because I’m happy for someone else to do the work and keep a portion of them.


The miniature eggplant has done well. Will we get another harvest of it this year? Stay tuned. I’m still relatively new with this fine vegetable so I’m learning. It has produced several nice fruits in two harvests so far.


Raspberries, lovely raspberries. The rain has made them plump. They usually give us fruit until first frost.

 Here’s the year’s experiment—squashplanted in straw bales. Zucchini, Delicata and Butternuts are growing. Will the winter squash plants produce before frost? I’m not sure but I am hopeful.
We get a few grapes in lucky years. It’s not that they don’t produce; the wildlife usually get to them before we do. This year, the cardinals have been chirping happily as they eat.

What’s growing in your garden now?

Tuesday, August 20, 2013

Kentucky Fajitas


My spring and summer days have gone into planting, weeding, watering, harvesting then eating or preserving. Yes, in my absence from the blog I’ve been doing what I write about –enjoying the goodness of the garden. I hope you’ve been doing the same.

I return today with last night’s meal. Anyone who’s been in a Mexican restaurant has smelled the sizzling fajitas as the onions and spices waft through the air on a trail of steam. The server delivers the tempting plate to a neighboring table and I sometimes wish I had ordered it. 

Fajitas are one of those dishes that easy to prepare at home, especially if you have leftover fried chicken. My husband is the fried chicken king. He generously cuts the breast portions in half so I have smaller pieces that are more appropriate for my appetite. If only the two of us partake of the chicken, I have plenty for leftovers for the upcoming week. So I return to my blog with Kentucky Fajitas, created with Jim’s fried chicken and vegetables from the garden.

Kentucky Fajitas
1 red bell pepper
1 small onion
1 small zucchini
1 carrot
a handful of Swiss chard
2 cloves of garlic
1 TBSP olive oil
salt, pepper, oregano and cumin to season
favorite salsa, cheese and tortillas

Slice first four vegetables into small sticks. Heat oil at medium heat in skillet. Add veggies and a little salt. Warm chicken in toaster oven. (You can also use a microwave or the skillet, but I find a toaster oven keeps it moist and doesn’t heat up the house tremendously, a benefit in warm weather.) Chop chard until you have 1 cup or so. Chop garlic and add to veggies. When veggies are nearly as soft as you want, toss in the chard then add a sprinkle of the remaining seasonings, except salsa. Turn veggies to low and check on chicken to see if it’s heated through.

Grate cheese. I use whatever I’m in the mood for and have in the house. Sometimes I like the crumbly, white Mexican cheese. Then I get on a Swiss cheese kick or only have cheddar in the house. Last night I used marble cheese.

I also alternate tortillas. I prefer corn tortillas, which have more flavor and fewer calories. Sometimes I also use whole wheat tortillas. Either kind will warm well in the microwave for 10 – 20 seconds or in a warm skillet.

With everything warm, I chopped the chicken into slices then laid out one whole wheat tortilla and one corn tortilla. The whole wheat tortilla was larger, so I put in a layer of cheese, veggies, chicken, salsa (we make our own) and more veggies. The corn tortilla is smaller so I filled it with just a little cheese, veggies and chicken. 

The result? When I return from our favorite Mexican restaurant, I drink lots of water. Their flavorful food is high in salt. Not so for our home-grown and prepared Kentucky Fajita. So try your own and enjoy the goodness of your own garden.

Wednesday, March 20, 2013

Experimentation season begins


Every year, my gardening adventures include at least one or two experiments. I learn and adapt my approach as needed for better future success. This year I’m incorporating lessons from past gardening seasons and trying a few new tactics.

Greenhouse growing
We received a small, plastic-covered greenhouse as a gift a few years ago and enjoyed it immensely. It turned out to be a wonderful location for growing our seedlings to planting size. We also sprouted some of the seeds in the greenhouse once the weather warmed. Plus, on the cooler days, one of my joys was walking into that warm greenhouse.

However, our greenhouse only lasted two years. We originally placed it too close to the edge of our garden where Jim ran over a piece of it with the mower. Once the plastic ripped in one place, no amount of taping repair could keep the rip from growing and replicating in other places.

This time, we’ve placed the greenhouse further into the garden. When we no longer need it for spring growing, I can take it down to spare it standing in summer weather it doesn’t need to endure. Then I can put it up once again when I need it for the fall. Since it doesn’t take more than 30 minutes to assemble, once I know what I’m doing, it isn’t a big job to re-locate it.

There are seedlings in it right now and on sunny days I need to raise the door flap for awhile to cool it off. The herbs, cabbage and broccoli inside look happy, just as I am when I enter that warmth.

Vegetable choice
Two weekends ago I was thrilled to spending one of my sunny weekend days planting seeds in the garden instead of working inside my heated house to fill pots with soil and seeds. I made spaces for spinach, kale, kohlrabi and rutabagas. One of the spinach varieties (Dolce Vita) is new to me and I’ve never even eaten a rutabaga, much less grown then. When they sprout, I’ll need to find photos of what the leaves are supposed to look like to I don’t weed out the actual plants, a problem I had the first year I tried to grow jicama. If my experiment makes it to the harvest stage, I’ll also be searching for recipes for this root vegetable.

Lasagna gardening
Three months ago we built a “lasagna garden” bed on one-third of our garden. After laying out the cardboard, we covered it with compost topsoil then straw. Now it’s time to begin planting there.

My plan for this year is to use it for seedlings rather than seeds; I assume the straw layer would prohibit germination. So I’ve started with a few cabbage, brussell sprout and onion plants. When I first separated the straw to find the soil into which I could plant the onions, I was surprised at how difficult it was to work through the straw. Eventually, however, I found a good routine and became less fearful of moving some of the straw so it would be easier to make a space for the plant. So far, everything looks happy.

Experimentation adds fun to my gardening adventure. What experiments are you trying in this year’s garden?

Monday, February 25, 2013

Creativity with Leftovers


As I clean the kitchen on Saturdays, one of my tasks is to check the refrigerator to see what leftovers are still lingering from the week’s meals. This weekend I found three items that looked like they would work well together—meatballs, pizza dough and roasted vegetables.

I’ve been making olive oil pizza dough from the book Artisan Bread in 5 Minutes a Day for several years. I often add whole wheat flour to dough but other than that, I stick with their recipe. I’ve long wanted to try making my own calzone, so this looked like the perfect opportunity.

My first calzone experience was at the Festival of San Gennaro in New York’s Little Italy when I lived in the city. The calzone is a great walking sandwich for a festival since it’s a substantial, Italian turnover which typically has cheese or meat inside. I remember the turnover dough being so hearty that I wasn’t sure I would be able to finish it.

I wanted to roll my dough thinner than what I had eaten so it wouldn’t be so carb-heavy. I rolled it out to approximately 8” by 10”.

Next, I spread a thin layer of tomato paste on the dough and topped it with thinly sliced garlic and a healthy sprinkling of shredded Swiss cheese. Then I cut the three leftover meatballs in two and placed them in the center of half of the dough. The roasted butternut squash and beets came next. I placed them on both sides of the meatballs. Don’t over stuff the calzone.

 You’re almost finished. Top the meatballs and vegetables with lots more shredded cheese.


The final step is to lightly moisten the edges of the dough. Fold one half over the meatball filling and lightly pinched the edges together. I finished mine with a ravioli roller then brushed on a little olive oil.

At this point, I sprinkled cornmeal onto a pizza peel, put the calzone on top of the cornmeal and put the pizza peel on top of the oven. As the oven and pizza stone inside warmed to 450 degrees, it gave the dough time to rest and rise a little. Note: if you don’t have a pizza peel, try using the bottom side of a cookie sheet.

As the oven was ready, I slid the calzone onto the pizza stone and cooked for 12 minutes. When it was browned, I removed it.

I cut into it and could see it would be delicious. I was right!

How are you being creative with leftovers this week?

Wednesday, February 13, 2013

A recipe for Ash Wednesday


Since this begins the Lenten season for Christians around the world, I thought it was a good time to re-post one of my recipes that uses no meat but has gotten rave reviews. As my goddaughter says about most of what I cook (yes, I did say MOST—she is a teenager after all), it is “nutritious and delicious!”


However, before we get to the recipe, I want to remind you that the Catholic tradition of not eating meat on certain days can help us, Catholic or not, identify with people around the world who don’t have an opportunity to add meat to their diet. For many years, I’ve participated in the Rice Bowl campaign during Lent, through which I save money I might have spent on meals out, special foods, etc. to donate to the good work of Catholic Relief Services throughout the world. As a former employee of the organization, I’ve seen this good work in person and it’s has impressive results. 

A fun part of Rice Bowl is that they publish a calendar of simple recipes, along with stories about the countries they represent. To find these recipes, go to the website and click on the Stories of Hope tab. This year they’ve also added a video that shows some of the preparation steps.

Now, here is my recipe that I hope you’ll enjoy.  

Fall Navy Bean Soup
1 1/4 cup navy beans
½ yellow onion
½ red onion
1 carrot
3 medium beets
1 small butternut squash
salt, pepper, garlic powder
baking soda
1 sprig fresh majoram
1 sprig fresh thyme
1/3 cup chopped parsely
2 sage leaves, chopped
1 ½ TBSP vegetable bouillon

Soak beans in salt water a few hours to soften. Rinse. Put in soup pot, cover with water, sprinkle in salt and baking soda then bring to hard boil for 10 minutes.

While beans cook, peel and chop onions, carrots and beets. Drain beans through colander and rinse. Return to pot and cover with about 2 inches of water. Add vegetables and bouillon plus salt, pepper and garlic powder. Cover and bring to boil then simmer 1- 1 ½ hours until beans are soft. Add squash and cook until soft (10 – 20 minutes depending on their size). Remove 2 cups soup and puree in blender. Return puree to soup pot with fresh herbs. You can puree more if you want to make the soup thicker without cooking it down. Stir and cook without lid until you like the soup’s taste and consistency. Enjoy!